- FAQs
- Storage & Maintenance
- How To Invert
-
Frequently Asked Questions
1. Should I use an inversion table?
DO NOT USE an inversion table without the approval of a licensed physician. Some medical conditions may not be suitable for use with this product. Please see Owner’s Manual for details.
2. How can I tell which is the Right Base Frame (8/9R) vs. Left Base Frame (8/9L)?
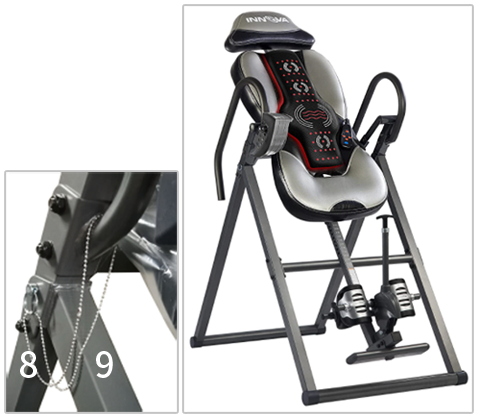
There is a Warning sticker on the Right Front Base Frame (9R). There is also aprotruding metal piece
3. My bolts do not tighten. What is wrong?
We use Nylon Lock Nuts to provide extra security for the inversion table. You will not be able to fully tighten the bolts using just your hands (it will only go a couple of threads). You will need to use two wrenches to tighten the nuts. Use one wrench to hold the bolt into place and use the second wrench to turn the nut.
4. I cannot invert or return. How do I find my Center of Gravity for a smoother inversion?
To be able to invert smoothly and easily, you will need to find yourpersonal center of gravity.
5. What Inversion Setting (slope) should I use?
We highly recommend all new users begin at a low setting (15 or 30). For many, this is something you will need to gradually get use to doing. Starting at a lower position may also help you get use to the pressures applied to your feet/ankles while inverting. Based on reviews and customer feedback, many users suggest that using the Inversion Setting of 30 or 45 provides sufficient results.
6. How long should I invert?
A general rule of thumb is tolisten to your body.
7. My legs/feet/ankles feel discomfort while I’m inverting. What can I do?
Hanging upside-down or in a position where your feet are above your head will put a lot of pressure to your ankles. For many, this is something you will need to gradually get used to doing. Starting at a lower Inversion Setting (slope) and inverting for shorter periods of time may also help the body get use to the pressures applied to the feet/ankles while inverting. Here are a couple of tips that can help :
– Wear proper footwear with top laced shoes can help provide extra cushion and support for your feet / ankles.
– Adjust the Ankle System so that it is snug enough to secure you. Do not tighten the Ankle System too tight against your ankles / legs. This can restrict your blood flow and cause discomfort.
– Contact us and we will help you.
8. My feet move from the Footrest when I invert. Is this normal?
As gravity works, you will move a little and your shoes may no longer touch the Footrest. Your feet / ankles will then hold your entire body weight. You may need to start at a lower Inversion Setting to allow your body (and yourself) to get use to inverting and hanging upside-down.
9. I am new to inversion and I am nervous- any tips?
It’s normal to be nervous about trying something new, especially when it means rotating upside down. Here are some tips:
– Start at a low inversion position (15) and let your body get used to laying horizontal or at a slight inversion.
– Have a spotter: have a friend or family member with you while you use your inversion table.
– Listen to your body: DO NOT invert more than what you are 100% comfortable with, that means level of inversion and time inverted.
– Level out: When inverting, start at a horizontal position to prepare your body for inversion. When returning, return to a horizontal position before coming back up to let your body adjust.
10. Can I place my inversion table outside?
Innova Inversion Tables are for indoor, household and non-institutional use only. -
Storage & Maintenance
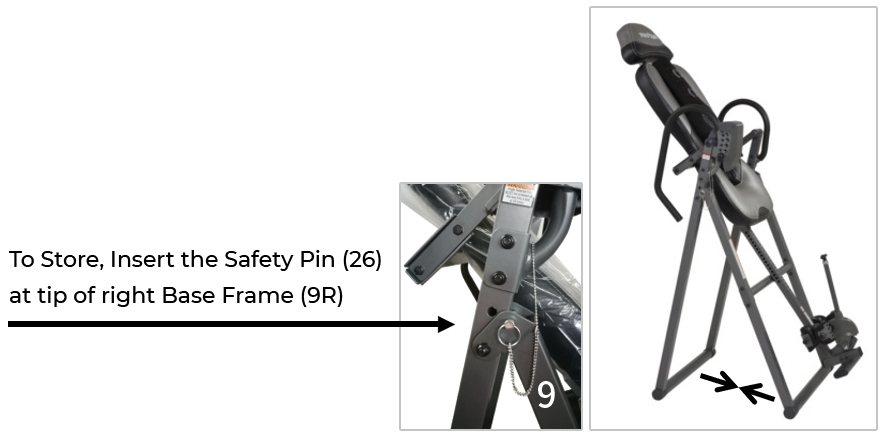
 Remove Safety Pin (26) from the tip of the Base Frame (8&9). Pull up on the Handlebars (6/7) to fold the Base Frame (8&9). Re-insert Safety Pin into the hole near the tip of the Base Frame (9).
Be sure to leave the Base Frame (8&9) wide enough to remain stable or secure it to a wall to prevent tipping.
There are other storage options for this inversion table. Be sure the inversion table is stored safely and make sure it does not slam, fall, or tip over. Contact us for other storage options.

WARNING : Do not
Be sure all parts of the inversion table are not left unstable (easily moved) when not in use. Be sure the device is completely secured to prevent tripping or blocking.
NOTE : Use a lock (NOT included) to secure the Height Adjustment Tube (3) to the Cross Bar (12) to prevent unauthorized usage of the inversion table.
To CLEAN, wipe your inversion table with a damp cloth. DO NOT use abrasive cleaners or solvents. -
Before inversion, you should :
1 ) Adjust the Height Adjustment Tube to your height number.
2 ) Tighten the Angle Selector Pin.
3 ) Make sure your feet are secured snugly.
4 ) Lie flat on the backrest.
NOTE :
To be able to invert smoothly and easily, you will need to find yourpersonal center of gravity.
NOTE :
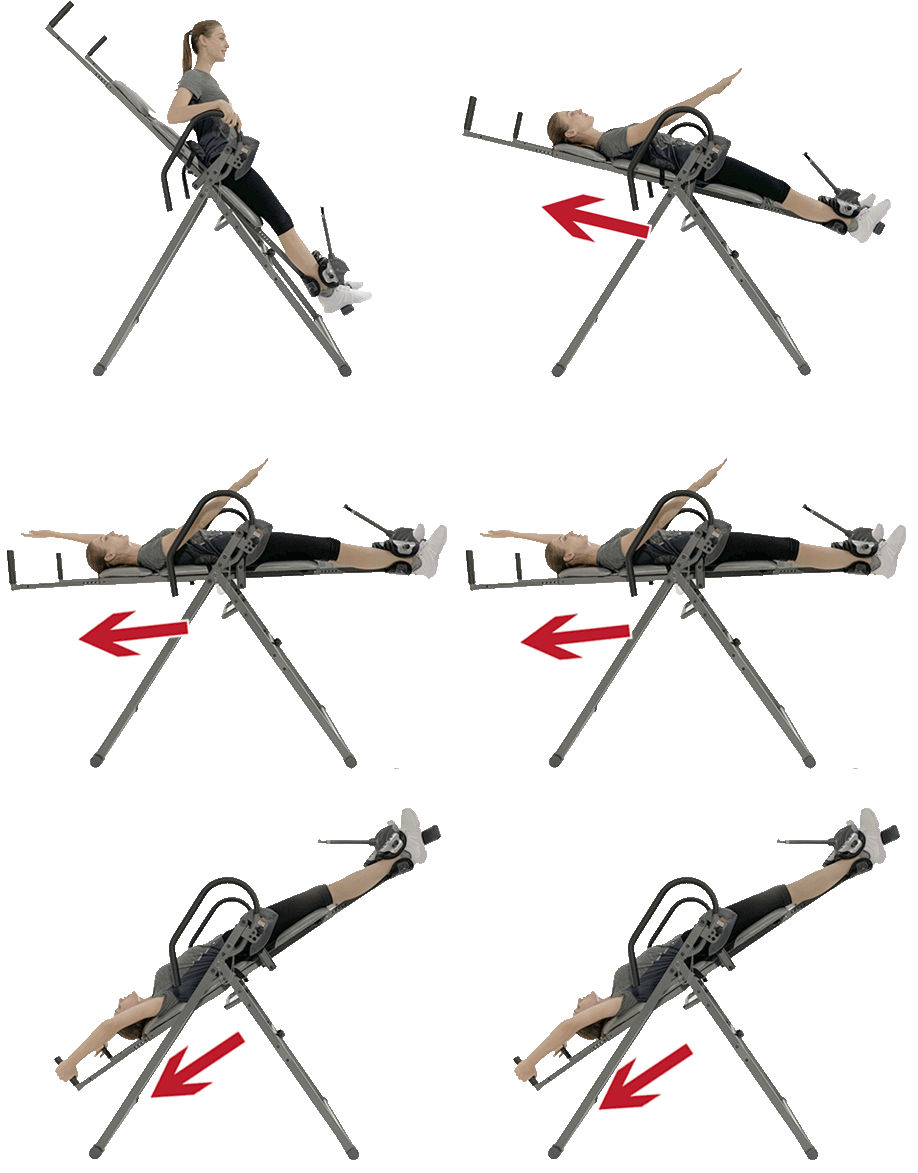
TO INVERT
 To invert, the inversion table, slowly raise one arm and move it up and over your head. The inversion table should begin to tilt back slowly. Then, slowly raise your other arm and move it up over your head. The inversion table will safely invert. Rest your arms over the head and relax.
If the inversion table does not invert, set the Height Adjustment Tubeupwards downwards
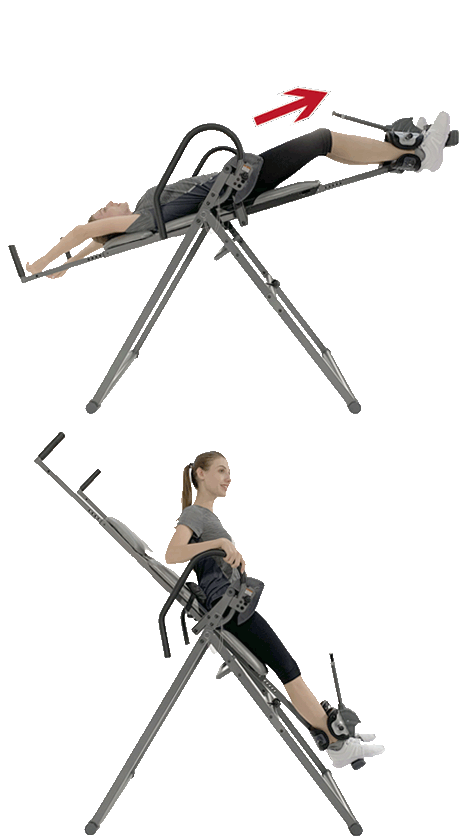
TO RETURN
 To return to upright position, slowly move your arms back to your
thighs bend your knees
Try to rely on your center of gravity to return upright. DO NOT lift your head, try to sit up, or just rely on the handlebars to return upright.
CAUTION : By slowly moving your arms back to the starting position, the inversion table should return to the upright position. If it does not, use the built-in handlebars to slowly help pull yourself back upright. Lower the Height Adjustment Tube downward one position at a time to accommodate your height and body type.